Getting Started with Raspberry Pi and a Test and Measurement Device

This guide outlines the process of configuring a Raspberry Pi 5 model B to control Test and Measurement devices and by the end of the guide, WaveForms will be running on the Raspberry Pi 5 module. (Applicable to a Raspberry Pi 4 also.) In this guide, a so-called “headless” setup will be used, but other setups work as well.
Inventory
Hardware
- A Digilent Test and Measurement device
- A 5V 5A USB-C power supply
- A USB-A to USB-C 3.2 Gen 2 cable
- A minimum 8GB microSD card (an adapter might be needed, if your computer doesn't have a microSD socket)
- A Computer connected to Wi-Fi
Note: If you plan to use your Raspberry Pi in another setup (with a display, or with an Ethernet connection), you might need additional hardware.
Software on your PC
- TeraTerm - or any other terminal emulator of your choice
Software on Raspberry Pi
Note: These programs will going to be downloaded and installed on the device, later in this guide.
Setting Up the Raspberry Pi
To see more setup options for your Raspberry Pi, check this site: Setting up your Raspberry Pi. If you have already set up your Raspberry Pi, you can skip this part.
- Raspberry Pi - "Headless" Setup
-
Insert the microSD card in your laptop, then download, install and open the Raspberry Pi Imager. Select the Raspberry Pi OS as the operating system and your SD card in the second column, then click write. Once the writing process is finished, extract the SD card from your computer.

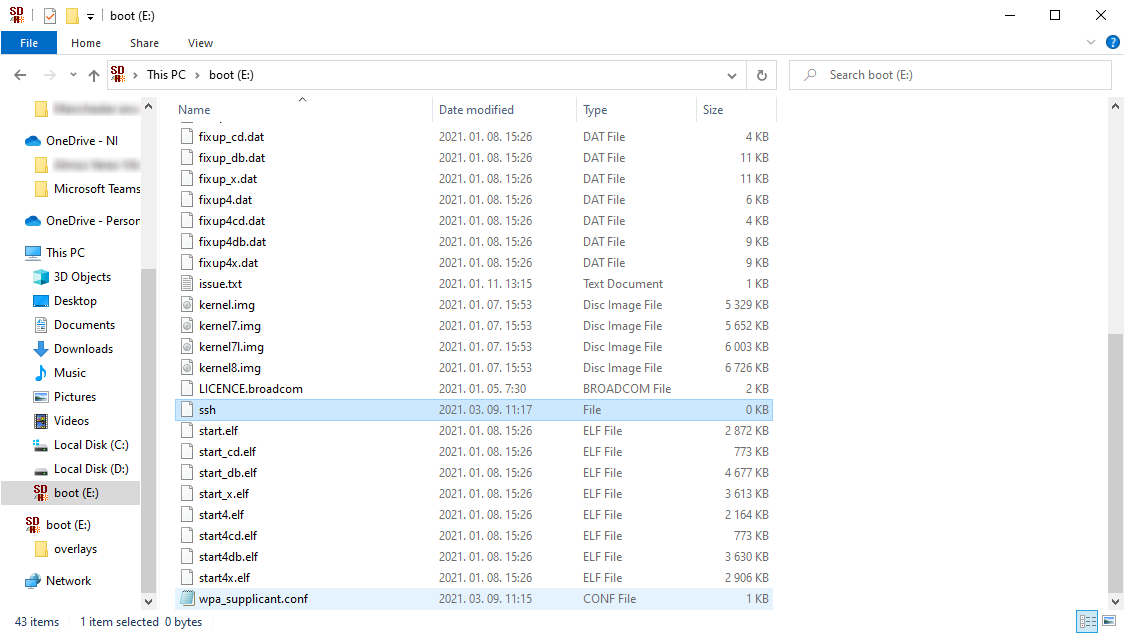
Reinsert the SD card into your PC. If you are working on Windows, you might be asked to format the SD card, but don't do that. Open the file manager, then open the only partition visible on your SD card: the boot partition.
First create a new file named ssh (without extension!) in the root directory. When the Raspberry Pi boots, it will look for this file and if it finds it, it will enable Secure Shell (SSH) connection. We will use this connection to send commands to the Raspberry Pi when it boots first.
Create another file named wpa_supplicant.conf (*.conf is the extension). Open this file with a text editor and copy the following lines in the file:
ctrl_interface=DIR=/var/run/wpa_supplicant GROUP=netdev
update_config=1
country=<Insert 2 letter ISO 3166-1 country code here>

network={
 ssid="<Name of your wireless LAN>"
 psk="<Password for your wireless LAN>"
}
Change the country code to fit your country, then set the SSID and the password of your Wi-Fi network before saving the file. This file will be used during the boot process of the Raspberry Pi to connect to the specified Wi-Fi network.
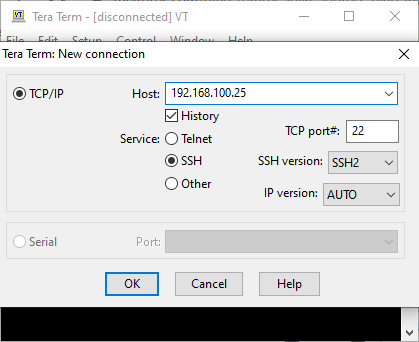
Insert the SD card in the Raspberry Pi, then power it up. Wait a bit (around 2-3 minutes) for the Raspberry Pi to connect to the network. On your PC, open a command prompt then display the Raspberry's IP address with the following command:
ping raspberrypi.local -4

On your PC, download, install, and open Tera Term, or any other terminal emulator of your choice, then establish a new SSH connection to the IP address of the Raspberry Pi.
Log in with the username:
pi
and passphrase:
raspberry
Now you can send commands to your Raspberry Pi. First update and upgrade the installed packages with the commands:
sudo apt update
sudo apt upgrade -y
When the upgrades are finished, open the settings of your Raspberry Pi with the command:
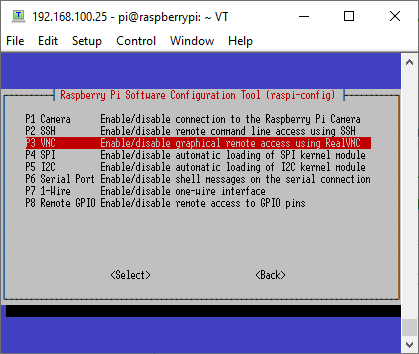
sudo raspi-config
You should see a graphical interface with different settings. Select Interface Options (number 3 in the current version of the operating system) with the arrow keys and confirm with the enter key. Now select VNC (P3 in the current version), then select Yes. This will enable Virtual Network Computing (VNC) when the device boots.
Exit the configuration tool with the escape key, then reboot the device with the following command:
sudo reboot
You can close the terminal emulator.
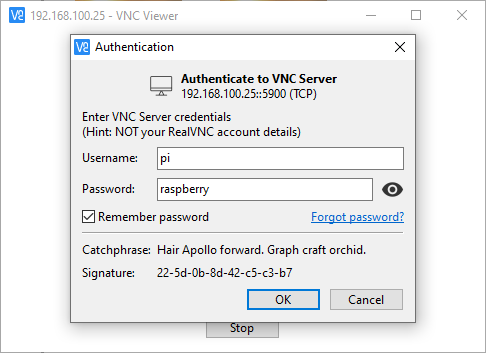
On your PC, download, install and open a VNC Viewer. In the search bar, enter the IP address of the Raspberry Pi, then log in with the username:
pi
and password:
raspberry
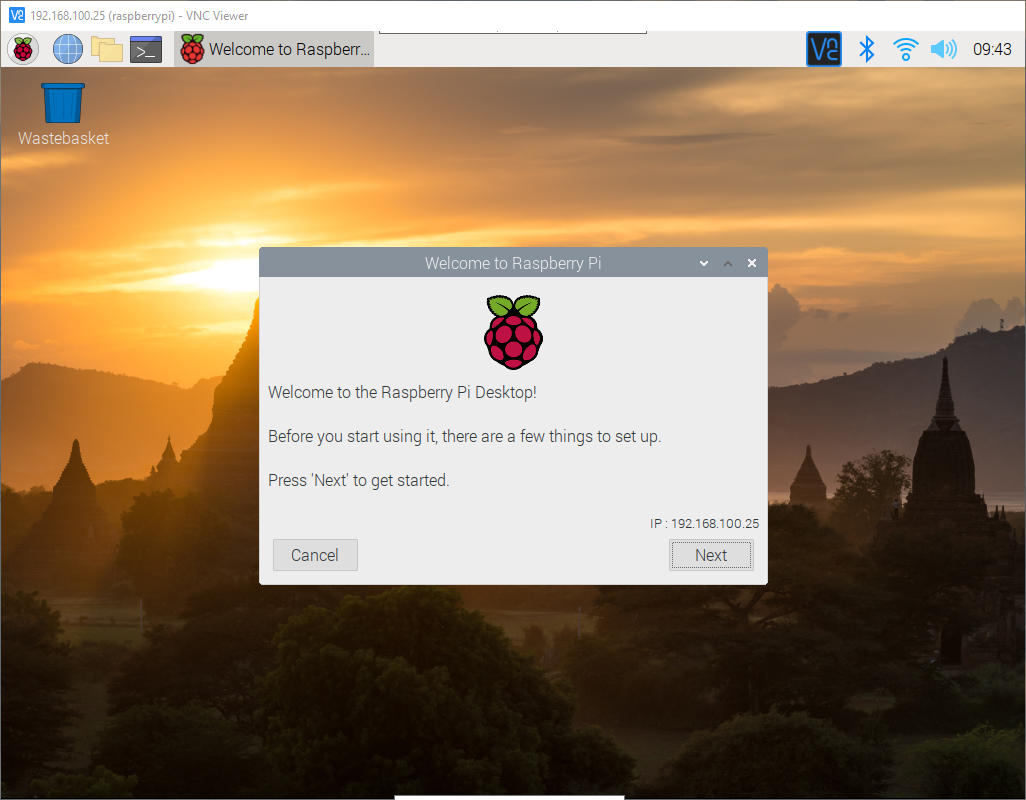
You should see now the “desktop” of your Raspberry Pi. Go through the initial settings as guided by the wizard to finish the setup.


Installing WaveForms on Raspberry Pi
Open a web browser on the Raspberry Pi to download the Adept Runtime and WaveForms software applications. Login to Digilent's My Products to access the downloads.

Select Adept Runtime for Linux Downloads.

Select ARM - Download 64-bit.deb. (Raspberry Pi modules running 32-bit Raspberry OS should select 'Raspberry Pi - Download'.)

Select WaveForms - Linux (ARM 64-bit.deb).

Open the folder your downloaded files are in using the RPi's File Manager, then hit F4 to open a terminal with that folder path. Install the downloaded packages with the following commands (don't forget to change the name of the files according to their version):
sudo dpkg -i digilent.adept.runtime_2.27.9-arm64.deb
sudo dpkg -i digilent.waveforms_3.22.2_arm64.deb

Using WaveForms on Raspberry Pi
Connect your Test and Measurement device to one of the USB ports of the Raspberry Pi (doesn't matter which port).
On the Raspberry Pi, open WaveForms: the launcher can be found in Programming and in Education.

WaveForms should automatically recognize the connected Test and Measurement device. If not, the Device Manager can be opened from the Settings menu.
Now you have your Test and Measurement device connected to Raspberry Pi. You can use WaveForms on Raspberry Pi like on any other PC. For more guides about WaveForms, check: WaveForms Getting Started Guide and Test and Measurement Guides.

Next Steps
For more guides on how to use the Digilent Test and Measurement Device, return to the device's Resource Center, linked from the Test and Measurement page of this wiki.
For technical support, please visit the Test and Measurement section of the Digilent Forums.