Programming an FPGA Board through Vivado's Hardware Manager
Vivado's Hardware Manager can be opened by clicking on Open Hardware Manager at the bottom of the Flow Navigator pane on the left side of the Vivado window.

The first step to programming a device is to connect the Vivado Hardware Server to it as a target. To get to the Open Hardware Target wizard click the  link in the green banner near the top of the window. From the drop-down that opens, select
  .
.
Once the wizard opens, click Next.

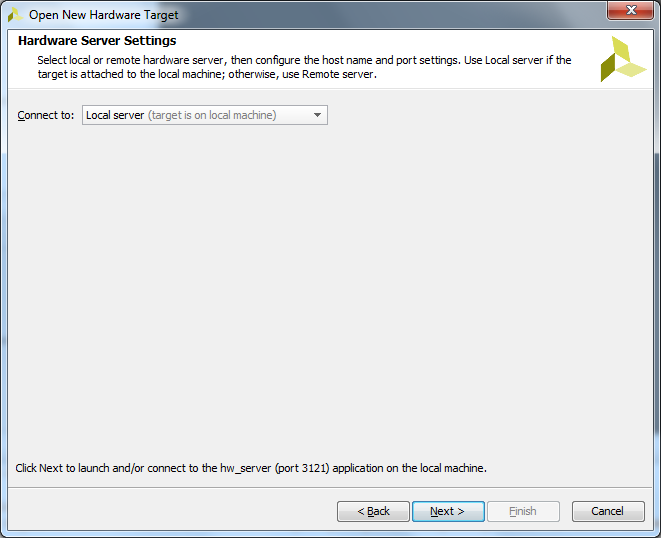
The next screen asks if the hardware server is local or remote. If the board is connected to the host computer choose local, if it is connected to another machine choose remote and fill in the Host Name and Port fields.
Click Next to continue.
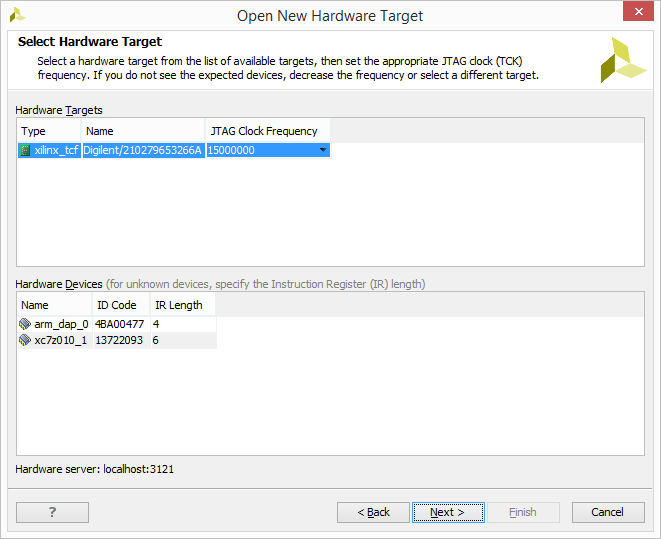
This screen gives a list of devices connected to the hardware server. If there is only one connected it will be the only device shown.
Click Next to continue.
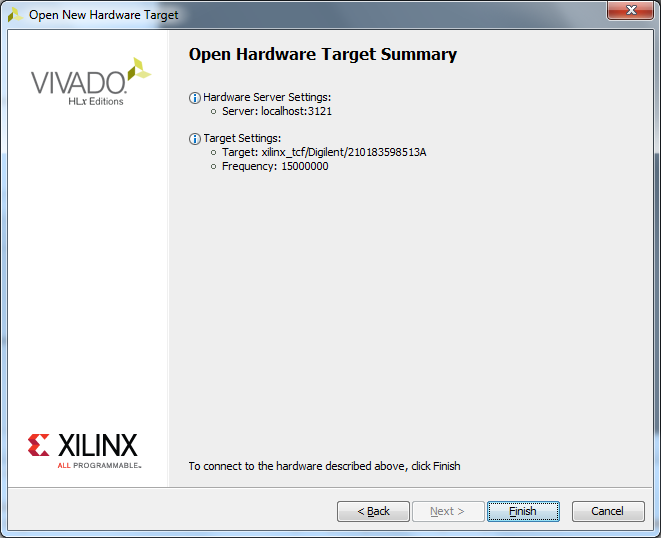
The final screen shows a summary of the options selected in the wizard. Verify the information and click Finish. The board is now connected to the hardware server.
To program the device with the bit file generated earlier, either click the  link in the green banner at the top of the window or click the
  button in the Flow Navigator under
  . From the drop-down that opens, select the device to program (Example:
  ) and the following window will open:
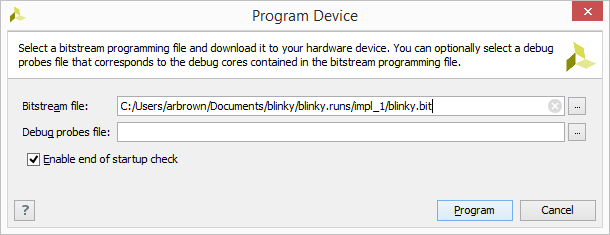
The Bitstream File field should be automatically filled in with the bit file generated earlier. If not, click the  button at the right end of the field and navigate to
<Project Directory>/<Project Name>.runs/impl_1/ and select the bit file (Example:  ). Now click Program. This will connect to the board, clear the current configuration, and program it using the new bit file.